
Pictostase

1st-person
Puzzle game

Made in
~200 hours

A game about taking pictures that freeze time
ROLE : GAME/Level Designer, programmer

CONTEXT
Pictostase is a video game project for my portfolio made in Unreal Engine 5. This project began with a simple idea "an image freezes a moment in time" and I thought to myself "why not trying out this idea ?" and then I began working on this trying to create a game based on this simple statement.
Pictostase is a 1st-person puzzle game in which you use your "Pictostase" to take pictures that freeze everything captured in the frame. You have to progress through a test facility, using your ability to resolve puzzles and repair an anomaly.
GAME DESIGN
For this project, as mentionned before, I started from a simple statement "an image freezes a moment in time". Therefore, I started prototyping this idea directly into Unreal Engine to see if the idea is fun and worth working on.
Developping the core mechanic was quite a challenge and right now it's not perfect but for the purpose of a portfolio project, it turned out okay.
While working on the mechanic, many ideas emerged to create interesting puzzles and, alongside, I started looking for references and taking inspirations from puzzles games to design the other mechanics. For the player not to be too lost, I decided to take common mechanics from the genre creating a sense of familiarity.

Mechanics
Movements

I designed a simple movement system with a walk and a jump trying to have a light character enjoyable for platforming sections.
Indeed, while working on the main mechanic, I've found that a bit of platforming would quite match with it.
To reinforce immersion and enchance game feel, I worked on adding camera shakes while walking and jumping as I usually do for 1st person games.
Pictostase

I designed the Pictostase inspiring myself from Viewfinder. The way it works is simple, you simply hold the mouse button and release it to take a picture and freeze every interactable objects contained in the frame.
Freezing objects have shown interest mostly in being used for platforming aspect. But I didn't want the player to simply freeze objects and jump on them to reach the end of the level.
Therefore, I thought about multiple ways to use the freeze mechanic by designing other mechanics which could work in harmony and add a puzzle aspect to the game.
Physic objects
When prototyping the Pictostase mechanic, I immediately thought about grabbing object and freezing them to be used as platforms.
I distinguished two types of physic objects :
- Grabbable physic object that the player can take anywhere. Motivates thinking skill.
- Non-grabbable physic object that cannot be moved. Motivates timing skill.
Buttons
After reviewing some puzzle games, I found that buttons could be very helpful to create puzzles.
I therefore used buttons I had in a prototype asset pack. They serve different purposes :
- Reset buttons are used to teleport objects back to their original position in case the player lost them. They are also useful to respawn falling objects.
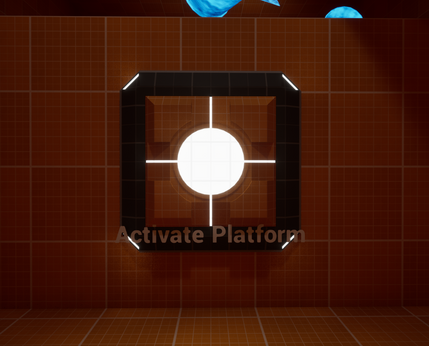
- Active buttons are used to activate elements such as moving platforms or doors. This allows me to create puzzles based on activating those buttons.
Moving platforms
As the non-grabbable object, I added the platforms for their timing aspect but also for their "moving objects around" ability.
It serves both for platforming and puzzles.
Turrets
The turrets were designed specifically for their puzzle aspect. At first, it seems that turrets shooting physic object would not add anything. But, I made them so the projectiles are reused by the turret even though you freeze them.
It serves a very interesting purpose because it teaches the player to freeze both the objects and the turret in the same frame.
They exist in both grabbable and non-grabbable form so the player is forced to freeze the non-grabbable one and can use the grabbable one as a platform.
Energy zones

But the turrets can't work without the energy zones. This constrainst is useful for the grabbable turrets because the player can actually move it around and use it as a platform without having to think about it shooting.
But I use it to also force the player to place turrets wherever I want so players don't break the levels. And it forces them to think about why the energy is there and how to use it.
Gameplay video
Level Design
For the Level Design, I wanted to practice how to create interior levels and I felt like creating a test facility was the most appropriate option since I took inspirations from Portal. The test facility allowed me to create a simple narrative of the protagonist having to progress through test rooms but I didn't want the level to feel like a video game as Portal did. I wanted the player to have a smooth progression between rooms, as Superliminal did, so the entire game feels like a single level segmented by rooms.
Learning diagram

I started with a learning diagram, listing every mechanics and creating a balanced progression. Each number represents a test room allowing me to structure the player's experience.
There are 2 types of level :
- Introduction level : I introduce a single mechanic so the player focuses on learning how to use it.
- Validation level : I blend multiple mechanics together to assess wheter the player understood the mechanics. Usually, the mechanics are used in unexpected ways to force the player to think outside of the box.
Flow curve

The flow curve emerges naturally from the learning diagram. Alterning between introduction levels and validation levels create the difficulty curve.
Though, this curve only works in theory, it gives a general idea of the difficulty but it needs to be tested and refined.
Intentions diagram

Then, with the intentions diagram, I describe how I want to structure each room and what I need to include (room size, mechanics used, ambience if necessary...)
It gives me a sense of how to design each room so I don't end up blocking out the level by improvising.
Though, as the learning diagram and the flow curve, it's still theory and when applying and testing it in the engine, it might be wrong so it need refining.
Blockout

